
Every year, thousands of people receive a diagnosis that changes their lives. But here’s something that might surprise you: when cancer is caught early, it has an increased survival rate. That’s where oral cancer screening becomes not just important, but potentially life-saving.
If you’ve ever wondered what happens during an oral cancer screening or whether you need one, you’re in the right place. Let’s walk through everything you need to know about this simple yet powerful preventive measure.
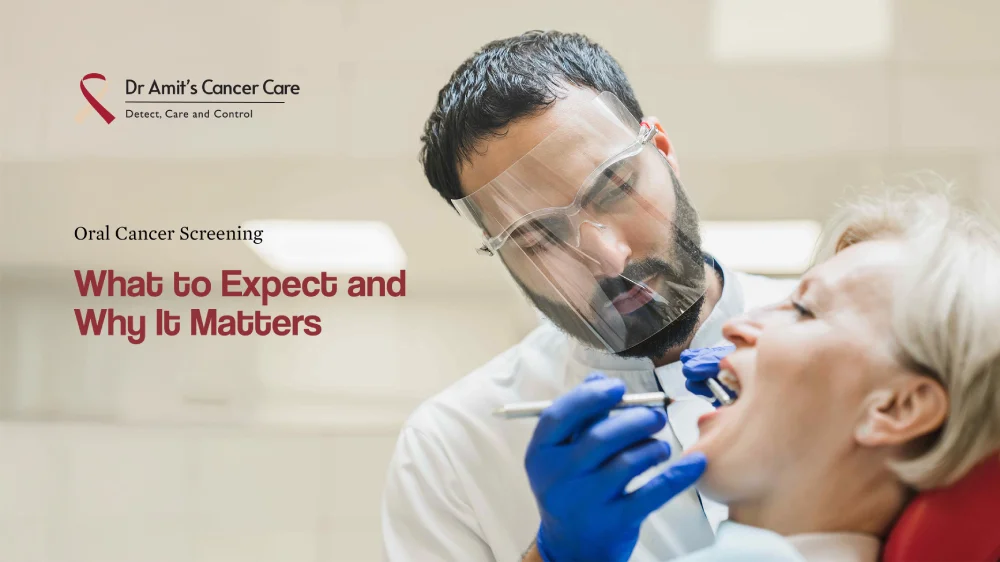
What Is Oral Cancer Screening?
A dentist or doctor carefully looks at your mouth, throat, and the areas around them to look for signs of cancer or precancerous conditions before they get worse. This is called an oral cancer screening. Think of it as a detective hunting for clues. The clues are strange changes in your mouth that most people would overlook on their own.
During this test, doctors search for changes in tissue that aren’t normal, lumps that don’t go away, sores that don’t heal, or areas that seem different from the rest of your mouth. This screening is simple, quick, and often performed during your routine dental exam.
Who Needs Oral Cancer Screening?
While routine screenings benefit everyone, specific individuals face a higher risk and should be particularly vigilant:
High-Risk Groups Include:
- Tobacco users (cigarettes, cigars, pipes, or chewing tobacco)
- People who consume alcohol heavily
- Those with a history of oral cancer
- Individuals with significant sun exposure (which increases lip cancer risk)
- People with HPV (human papillomavirus) infection
If you fall into any of these categories, discussing a screening test for oral cancer with your healthcare provider becomes especially important. Even if you don’t have these risk factors, regular screenings during dental visits provide valuable peace of mind.
Understanding the 8 Steps of Oral Cancer Screening
Now let’s get into the practical side of what actually happens during a screening? The oral cancer screening steps follow a systematic approach that ensures no area goes unexamined.
Step 1: Medical History Review
Your doctor will start by asking about your medical history, lifestyle, and any symptoms you’ve been having. This includes questions on smoking, drinking, past malignancies, and family history. This talk helps you figure out what your own risk factors are.
Step 2: External Examination
The first part of the test is a visual check of your face, neck, and jaw. Your provider checks for puffiness, asymmetry, or changes in your skin that don’t seem normal. They’ll gently feel (palpate) your lymph nodes and jaw to detect any abnormal lumps or masses.
Step 3: Lip and Cheek Examination
Next comes a thorough check of your lips, both inside and out, and the inner lining of your cheeks. The provider looks for colour changes, texture abnormalities, or sores. They’ll gently pull your cheeks away from your teeth to examine the entire surface.
Step 4: Gum and Oral Cavity Inspection
This step involves a careful evaluation of the gums, floor of the mouth, and hard and soft palate. Your provider looks for patches, lesions, or bleeding areas that may not be visible without close inspection.
Step 5: Tongue Examination
They look at your tongue from all sides: the top, the sides, and the bottom. They’ll tell you to stick out your tongue and move it around in different ways. The doctor uses gauze to gently hold your tongue and examine the places that are harder to see.
Step 6: Throat and Tonsil Check
A light and sometimes a small mirror are used to look at the back of your throat and tonsils. This helps visualise areas where oral cancer can develop, but might not be easily visible.
Step 7: Neck Palpation
Your provider will feel your neck more thoroughly, checking for enlarged lymph nodes or unusual masses. This tactile examination can reveal issues not visible to the eye.
Step 8: Documentation
Everything observed during the examination gets documented in your oral cancer screening form. This record becomes essential for tracking changes over time and comparing with future screenings.
These oral cancer screening steps typically take just a few minutes but provide comprehensive coverage of all potential problem areas.
Types of Oral Cancer Screening Methods
While the visual and tactile examination forms the foundation, several oral cancer screening products and technologies can enhance detection capabilities.
Conventional Visual and Tactile Examination
This remains the gold standard recommended by the American Dental Association. Your dentist uses their eyes and gloved hands to examine your mouth systematically. It’s simple, noninvasive, and effective when performed by trained professionals.
Adjunctive Screening Technologies
Oral Cancer Screening Light Devices: Some dental practices use specialised oral cancer screening devices that employ light-based technology. One example is tissue fluorescence visualisation, where healthy tissue appears differently under specific wavelengths of light compared to abnormal tissue.
Oral Cancer Screening Dye: Another adjunctive method involves rinsing with a special blue dye (toluidine blue). Abnormal cells may absorb the dye differently from healthy tissue, appearing blue. Like light-based screening, this serves as an adjunct to visual examination.
Important Note About Adjunctive Screening Products: Various oral cancer screening products are marketed to dental practices, but it’s crucial to understand their role. These devices can help highlight areas that deserve closer attention, but they don’t replace the need for biopsy if suspicious lesions are found. As emphasised by dental organisations, the most definitive and reliable method for diagnosing oral lesions remains surgical biopsy.
Types of Oral Cancer Screening Devices and Technologies
Oral cancer screening begins with a visual and tactile examination, but modern tools can enhance detection. Below are the most common screening devices and adjunctive methods used today.
1. Light-Based Detection Devices
These devices use special wavelengths of light to highlight abnormal tissue patterns invisible to the naked eye.
- VELscope
Uses blue light to detect tissue fluorescence loss, helping identify abnormal cells early. - OralID
A similar device that doesn’t require rinsing; it detects tissue changes using fluorescence. - ViziLite
Employs chemiluminescent light after an acetic acid rinse, making suspicious areas appear white. - Munh-Parikshak
An Indian innovation using both white and fluorescent light, connected wirelessly to smartphones for easy, low-cost screening. - Identafi
Uses three wavelengths (white, violet, amber-green) to reveal vascular and surface-level tissue abnormalities.
2. Vital Staining (Toluidine Blue)
This involves rinsing the mouth with a blue dye that highlights suspicious areas.
- Helps pinpoint abnormal cells but can yield false positives.
- Works best as a secondary check after visual examination.
3. Brush Cytology / Brush Biopsy
A non-invasive test where a small, soft brush is used to collect cells from a suspicious area in the mouth; these cells are then analysed under a microscope to detect early signs of cancer or precancerous changes.
- OralCDx is a widely used system.
- Quick and minimally invasive.
- Helpful in identifying precancerous changes before biopsy.
4. Molecular and Salivary Diagnostics
Emerging saliva-based tests analyse DNA, RNA, and protein biomarkers linked to oral cancer.
- Offer promise for noninvasive screening.
- Still under clinical validation; not a replacement for clinical examination.
5. Advanced Imaging and AI-Based Tools
New technologies combine imaging and artificial intelligence to enhance early detection:
- OralScan: Uses multi-spectral LED imaging (violet, green, red) with real-time AI analysis to differentiate between normal and suspicious tissue.
- Optical Coherence Tomography (OCT): Provides high-resolution cross-sectional images of oral tissues.
- AI-Assisted Analysis: Machine learning algorithms can identify patterns invisible to the human eye, supporting clinicians in early diagnosis.
Disclaimer: These technologies assist in detection but do not replace a professional evaluation or biopsy. Always consult a qualified oral oncologist or dental specialist for diagnosis.
When Should You Be Concerned? Warning Signs to Watch
Between screenings, being aware of potential warning signs helps you catch problems early. Contact your healthcare provider if you notice:
- A sore in your mouth that doesn’t heal within two weeks
- A lump or thickening in your cheek
- A white or red patch on your gums, tongue, tonsil, or lining of your mouth
- A sore throat or feeling that something is caught in your throat that doesn’t go away
- Difficulty chewing or swallowing
- Difficulty moving your jaw or tongue
- Numbness in your tongue or other areas of your mouth
- Swelling in your jaw
- Persistent ear pain on one side
Remember, having these symptoms doesn’t automatically mean cancer. Many conditions cause similar signs. However, any persistent change deserves professional evaluation.
What Happens If Something Abnormal Is Found?
Discovering an abnormality during screening doesn’t mean you have cancer. In fact, most suspicious areas turn out to be benign. Here’s what typically happens:
Step 1: Follow-Up Observation
Your dentist might schedule a follow-up visit in 2-3 weeks to see if the area persists, changes, or resolves on its own. Many mouth sores heal naturally during this period.
Step 2: Biopsy
If the abnormality persists or appears concerning, a biopsy becomes necessary. This involves removing a small tissue sample for laboratory analysis. Your dentist might perform the biopsy, or you might be referred to an oral surgeon or oncology specialist.
Step 3: Specialist Referral
For complex cases or confirmed cancer diagnoses, referral to specialists in head and neck oncology ensures you receive expert care. Experienced surgical oncologists like Dr. Amit Chakraborty, who specialises in head and neck cancer treatment, can develop comprehensive treatment plans tailored to your specific situation.
Step 4: Treatment Planning
If cancer is confirmed, your healthcare team will determine the stage and develop an appropriate treatment strategy, which might include surgery, radiation therapy, chemotherapy, or a combination of approaches.
Why Does Oral Cancer Screening Matter?
You might be saying to yourself, “I feel fine, so why should I worry about screening?” The truth is that oral cancer typically grows without any signs. A lot of people don’t show clear signs of the disease until it’s in its later stages, which makes therapy harder and less effective.
Early detection means:
- Better treatment outcomes
- Less invasive procedures
- Lower treatment costs
- Prevention of cancer progression
Take Charge of Your Oral Health Today
Don’t wait for symptoms to appear. Prevention and early detection are your best allies against oral cancer. If you’re in Mumbai, Nagpur, or Dubai and need expert guidance on oral cancer screening, evaluation, or treatment, schedule a consultation with Dr. Amit Chakraborty today. With over 18 years of specialised experience in head and neck oncology, Dr. Chakraborty and his team provide comprehensive, compassionate care tailored to your individual needs. For those seeking expert opinions, thorough evaluation, or second opinions on cancer treatment,
Ready to take the next step? Contact Dr. Amit Cancer Care to book your appointment or learn more about comprehensive oral cancer screening and treatment options.


 Dec 16, 2025